Processing third party form data in Next.js using Webhooks
April 20, 2022
Using Jamstack/serverless architecture has a lot of benefits, but there are a few things that need a little extra work outside of a traditional SSR-CMS based site, and one of them is handling forms. One great solution for handling forms is to use a third party service like Jotform or Typeform, but often these have limitations as the form data is processed on the form providers side. In some situations it’s great to be able to process the data yourself, for example if you wanted to send a custom email, or add data to a CRM system, in response to a form submission.
The problem with form data from third party services
Working in the JavaScript world, you may have using form libraries like React Hook Form or Vue Formulate, which by default handle their data in JSON format. You would take that outputted JSON data and send it up to a Node.js server as JSON, because that’s just how it’s done, right?
But standard forms on the web when sending from a HTML front end using POST data is handled a little differently by default. Here’s an example of a form:
<form action="http://www.foo.com" method="POST">
  <div>
    <label for="name">Full name</label>
    <input name="name" id="name" value="-" />
  </div>
  <div>
    <label for="email">Email</label>
    <input name="email" id="email" value="-" />
  </div>
  <div>
    <button>Submit</button>
  </div>
</form>
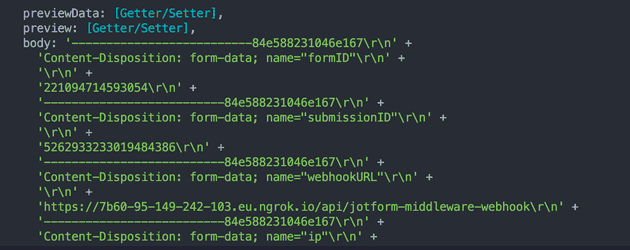
From our third party form service, this form data is usually sent to a server such as our Next.js server in format of multipart/form-data, which in my instance ouputs something like this in Next.js:
In a production level custom Node.js server with correct body parsing elements in place, this wouldn’t usually be a problem, but Next.js serverless functions there’s no form handling going on.
Parsing third party form data in Next.js
In Next.js serverless functions, form data needs to be parsed before being accessed in the usual way. The easiest way to do this is to use a package such as multiparty:
// api/my-api.js

import multiparty from "multiparty"

export default async function _(req, res) {
  const form = new multiparty.Form()
  const data = await new Promise((resolve, reject) => {
    form.parse(req, function (err, fields, files) {
      if (err) reject({ err })
      resolve({ fields, files })
    })
  })

  console.log(`Form data: `, data)

  return res.status(200).json({ data })
}

export const config = {
  api: {
    bodyParser: false,
  },
}
Following the Multiparty docs, it’s pretty simple to integrate with an endpoint using a standard Node.js request structure, but the part which is critical to a Next.js application is the changing of the default bodyParser:
// api/my-api.js

...

export const config = {
  api: {
    bodyParser: false,
  },
}
This turns off the default body parser which is provided to all Next.js serverless functions.
Now when a request is received, it will be accessible in that great JSON format you’re looking for:
data:  {
  fields: {
    formID: [ '2210943545593054' ],
    submissionID: [ '5262942945788003631' ],
    webhookURL: [
      'https://webhok-url/api/my-api'
    ],
    ip: [ '11.11.11.11' ],
    formTitle: [ 'Form' ],
    pretty: [
      'Name: Jay, Email: [email protected], Phone: 0777777777'
    ],
  }
}
Testing form service webhooks locally with ngrok
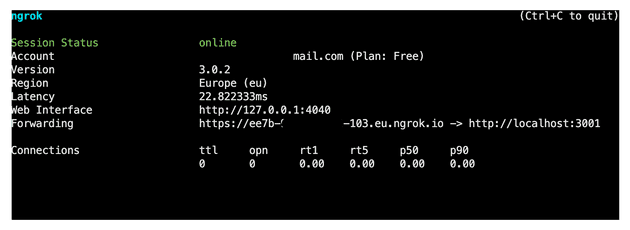
A little aside here is that it’s a pain to test and debug webhooks remotely, so using a service like ngrok is great for getting a publically accessible URL to tunnel to your localhost in order to receive those POST requests from your form service. Here’s how to use:
- Go to ngrok and sign up for a free account - this step is needed in order to receive requests!
- Once signed up, go to ngrok download and follow the instructions to download - be sure to run the step to add the auth token to your system.
- Rather than creating a connection to your local port 80 like in the docs (
ngrok http 80), use which ever local port your Next.js is running on. This is usually 3000 for me, so my command isngrok http 3000. - You should be given a public URL ending in
ngrok.iowhich you can add to your form provider’s webhook URL field while you test:
Senior Engineer at Haven


