My Whiskr web app is finished and here's how it's built
January 10, 2018
I’m a big believer of developing side projects alongside your normal, day-to-day work in order to expand your skillset in anything that takes your fancy. With the ever-growing world of web development it can be hard to delv into learning new techniques and technologies, so it’s important to decide on a side project which will keep your enthusiasm going.
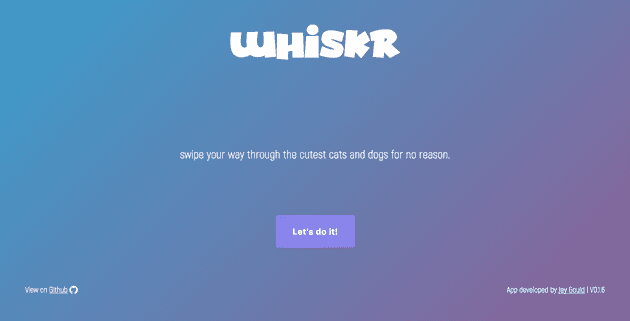
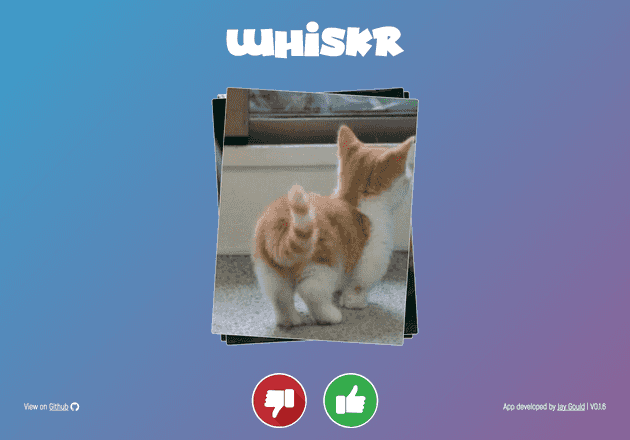
I’ve made a few side projects in recent years, but most recently wanted to make a Tinder-style web app to swipe through pictures of cats and dogs. Why not? It’s fun, different, and such a project that I could explore some new development and design approaches. Here’s the link if you want to take a look.
For this post I wanted to list some of the features of the Whiskr web app, how I approached them, and any alternative solutions I considered at the time of developing the project and published to Heroku (which was around October 2017).
The programming paradigm
Probably the choice which most defines any piece of software is how it’s fundamentally built. I normally develop websites and apps in object-oriented or procedural way (depending on the complexity or type of application) but more recently been interested in functional programming. I cover functional programming as a comparison to more traditional methods in a recent post which may be of interest.
With modern JS frameworks like Vue and React, I believe functional programming techniques are a little more common, so I wanted to bear this in mind when developing the front end of Whiskr. As mentioned in my recent post, the FP paradigm can be interpreted in many ways. For this project I decided to keep the adherence to FP quite loose. Honestly, it may have been better suited to have it OO but I wanted to practice building an application without a framework using some FP techniques such as function composition and loose immutability, which leads to my next point.
As the front-end of the Whiskr app is based largely around user input events (swipes, clicks) a functional reactive technique would have worked really well as described in this great Stack Overflow post but I’m saving that for another post with something more complex.
Framework or no framework
There’s the age-old choice of using a front-end framework or develop without. As I’ve spent a lot of time using React, React-Native and Vue recently, I opted for vanilla ES6+ Javascript for the front-end. Also I think for this type and size of project, using something like React may be a bit of an overkill - it doesn’t require much routing, many components, and mostly based on firing JS events left, right and center.
I did, however, use Webpack as I felt it would be a good opportunity to get Webpack up-and-running without using a CLI generator like Angular CLI or Create React App. My webpack.config.js file is around 30 lines of code compared to the hundreds of lines you get auto-generated by framework CLI tools, as all I really needed is bundle up my JS and CSS and enable SASS, so it really puts it into perspective how much configuration you may not need.
The back-end
The back-end of the app is built in Node and is also relatively small, using a structure I’ve laid out from past Node projects over the last couple of years. I originally used the Node Express Hackathon Starter repo which is absolutely brilliant, but again a bit of an overkill for somthing like this. I guess the whole point of that repo is you take out the bits you don’t need, and more importantly change or add bits which will make it yours.
The Node/Express combination is always a winner, but it’s not very often I get to use it as a full, server side part of an application. I often use it simply for an API endpoint by firing off axios or fetch calls and getting some sweet JSON responses back, but I love using it as a traditional web stack of routing with HTTP requests too so I went for that, as well as having a separate dedicated Route controller to be used just for API endpoints for the front-end fetch requests.
Retrieving and storing the cute doggo and kitty pics
One of the main reasons I thought of making this was because I wanted to develop my own web scraper. There are so many ways of making a web scraper for gathering info from external websites, but I had an idea of doing this via Node using the CLI, so I made the Command Scraper. I also wrote a blog post about making the Command Scraper after I finished the Whiskr web app so it’s worth a read if you’re interested.
This excercise was useful as it at the time of developing and releasing it, there was nothing out there which used Node and did exactly what I wanted, which was saving the images from a given website using a given class name on said website, saving to a location of my choice, and using the data from a sucessfull save to store the reference in a database. Perfect!
Once scraped, the images and references are stored in a remote MongoDB. I’ve used Mongo a lot now and getting a little bored of it to the point where I wanted to use Postgres, but as I was against time at this point I wanted to use Mongo for a quick solution for data storage.
Core functionality - yays and nays
One of the main features of a Tinder-type app is the approval or rejection of the images (which I’ll refer to as cards). As brutal as it is, I feel worse rejecting a cat or dog pic that I could imagine doing it on Tinder with humans. They don’t even know they’re on there! Poor things…
Anyway, like on Tinder, the interface allows a swipe or the tap of a button to say ”yay” (yes) or ”nay” (no) to the subject. Alongside this, the exit of the image will animate out to the left or right side of the screen and a new card will be added to the bottom of the deck.
Button click event
The button pressing was basic. I added event listeners to the yay and nay buttons and on click of the button take the data attribute of the element, send to the server to log if the card was a yay or nay, and run a function to pop the card from the top of the deck. Inside the popCard() function is another function to push a new card to the bottom of the deck. This gives the illusion that the deck is never ending.
...

const cardWrap = document.getElementById('cardWrap');
const yesnoBtn = document.querySelectorAll('.yesno');

yesnoBtn.forEach(btn => {
  btn.addEventListener('click', e => {
    e.target.parentNode.classList.contains('yes') ? _clickYes() : _clickNo();
  });
});

const _clickYes = () => {
  let topCard = cardWrap.lastChild;
  CardsApi.markCard(
    topCard.getElementsByClassName('card')[0].getAttribute('data-id'),
    'yes'
  );
  topCard.classList.add('spinOutYes');
  popCard(topCard, 'yes');
};
const _clickNo = () => {
  let topCard = cardWrap.lastChild;
  CardsApi.markCard(
    topCard.getElementsByClassName('card')[0].getAttribute('data-id'),
    'no'
  );
  topCard.classList.add('spinOutNo');
  popCard(topCard, 'no');
};

...
Swipe event
The swipe events took a little more digging around as I don’t use them in day-to-day projects. One of the options I explored was using Javascript’s native touchstart, touchmove and touchend events, but I after getting near the end of completion of the swipe gesture part of the project, I decided to go another route. This was because the image was not moving at the same position as the finger, which was due to some mis-calculations in the touchmove event.
The touchmove event must update the object you’re moving on each frame, and caluclate the net distance moved. This requires doing some calculations which seemed long-winded (as per the below):
...

const _initSwipeGesture = cardId => {
  let theCard = document.getElementById(cardId);
  let theCardImg = theCard.getElementsByClassName('card')[0];
  if (theCard) {
    let longTouch = false;
    let touchStartX = null;
    let touchMoveX = null;
    let moveX = null;
    theCard.addEventListener('touchstart', event => {
      setTimeout(() => {
        longTouch = true;
      }, 250);
      touchStartX = event.touches[0].pageX;
    });
    theCard.addEventListener('touchmove', event => {
      touchMoveX = event.touches[0].pageX;
      moveX = theCardImg.offsetWidth + (touchStartX - touchMoveX);
      theCard.style.transform = 'translate3d(-' + (moveX - 160) + 'px,0,0)';
    });
    theCard.addEventListener('touchend', event => {
      let absMove = Math.abs(theCardImg.offsetWidth - moveX);
      if (longTouch == false) {
        console.log('longtouch');
      }
      theCard.style.transform = 'translate3d(-50%,0,0)';
    });
  }
};

...
It seemed like it was kind of working, but was quite glitchy. Aftrr doing some research it turned out there were some weird edge cases and different requirements for IE, at which point I decided to use Hammer JS.
I’d used Hammer JS in a few other projects a while back but not for the purpose of what I needed here. Instead of listening to a number of different JS events for touching and swiping, the Hammer JS lib abstracts, removes cross-browser issues and provides needed functionality in an pan event. The above snippet was later re-wrote to use the pan event:
...

const _initSwipeGesture = cardId => {
  let theCard = document.getElementById(cardId);
  var hammertime = new Hammer(theCard);
  hammertime.on('pan', function(ev) {
    var percentage = 100 * ev.deltaX / window.innerWidth;

    theCard.style.transform =
      'translate3d(' + percentage + '%,0,0) rotate(' + percentage / 10 + 'deg)';
    if (ev.isFinal) {
      if (ev.velocityX > 1) {
        _clickYes();
      } else if (ev.velocityX < -1) {
        _clickNo();
      } else {
        if (ev.deltaX > 100) {
          _clickYes();
        } else if (ev.deltaX < -100) {
          _clickNo();
        }
        setTimeout(() => {
          theCard.style.transform = 'translate3d(0,0,0)';
        }, 80);
      }
    }
    //theCard.style.transform = 'translateX(' + percentage + '%)'; // NEW: our CSS transform
  });
};

...
The most useful part of this is that the pan event gives you access to the deltaX and deltaY values which is the net distance either side of the center point which is a pain in the ass to calculate and get working otherwise. You also get velocity, and a few other helpful bits which are useful.
Conclusion
And that’s about it for the notable decisions I’d made at the time of building. I decided to use Pug templating as I think it’s pretty awesome although I feel it reduces productivity at this point when I’m not using it all the time.
If you have any questions about anything, correct a mistake or suggest anything, tweet, email or write a PR in the Whiskr Github.
Thanks for reading!
Senior Engineer at Haven


