Creating my user approval based web scraper using Node
October 15, 2017
I’ve recently been spending a couple of evenings a week on a small side project for which I’ll be doing another post on once I’ve finised. Whilst developing this side project, I required a way of gathering images from websites which I could save to a database, so I naturally looked for Node web scraping code I could use. Through a decent amount of time searching for something off the shelf, I realised I wanted to make my own.
A side note about web scraping. Always check the Terms of Service on a website if you’re going to attempt to scrape it’s content. The owner may not want their site and bandwidth touched by scraping so be mindful, and respect peoples wishes. If unsure, drop the website owner an email :)
As this is something pretty specific I wanted, I tried a few different ways of doing some of the tasks. I wanted to use this post to show my thought process as I think it’s important sometimes! There are way too many blog posts out there which show the end product like it was easy to reach, missing out the pain and time consuming parts which get us to the finish line.
Requirements
My requirements were such that I couldn’t find something which would do exactly what I wanted, so the opportunity arose to develop my own web scraper using Node. My scraper needed the following requirements:
- A Node based web scraper
- Search a website from a specified URL
- Within the given website, search for images which have a specified class name
- For each image, present to the user and allow the user input to determine whether the image is processed and saved to the server and database
Most web crawler code out there didn’t have the final step, which is important as I want to be able to control the images which were retrieved. I initially thought of having some web based user input method, but this seemed boring. Instead I decided to aim for a user approval process via the terminal.
Scraping the site
I used a few NPM packages to assist with grabbing the content. Here’s the initial code:
//scraper.js
const express = require('express');
const request = require('request');
const cheerio = require('cheerio');
const router = express.Router();

router.get('/scrape', (req, res) => {
  const url = 'https://www.some.url.com/';
  request(url, function(error, response, html) {
    if (!error) {
      var $ = cheerio.load(html);
      let photos = [];
      const imgWraps = $('.photos').children();
      $(imgWraps).each((i, elem) => {
        if ($(elem).attr('class') == 'photo-item') {
          let url = $(elem).find('.photo-img').attr('src');
          photos.push(url);
        }
      });
      console.log(photos) //shows an array of the URLs in the scraped site

      ...

    }
  });
});

module.exports = router;
The first thing to note is that the entire scraping process will happen when the browser is directed to the route specified here (in my case, http://localhost:1337/scrape), using Express Router.
I then use the request package which takes the target websites url and returns the entier contents of that website in a variable (html). This returns the DOM, so we need something to be able to traverse the DOM and pick out what we want. That’s where cheerio comes in.
Cheerio is a great package which allows a DOM representation to be manipulated by using the oh so familiar jQuery syntax. Once loaded into Cheerio, we’re able to use things like $(element).parent() or $(element).find('.someClass') etc.
Finally as the DOM is searched, if we come across an image with the class name photo-item, we add the image src to a photos[] array which we will use later for the user approval.
The user approval Promise
Once we have an array of images it’s time to start thinking about how the images are going to be processed. Getting user input and display the images is asynchronous so I needed to find a way to handle that, as well as keeping the user approval code seperated to make it easier to read and modular, so I decided to import the user approval process from another file:
//scraper.js
...
const scrapeFn = require('./scraper/index');

router.get('/scrape', (req, res) => {
  const url = 'https://www.some.url.com/';
  request(url, function(error, response, html) {
    if (!error) {
      var $ = cheerio.load(html);
      let photos = [];
      const imgWraps = $('.photos').children();
      $(imgWraps).each((i, elem) => {
        if ($(elem).attr('class') == 'photo-item') {
          let url = $(elem).find('.photo-img').attr('src');
          photos.push(url);
        }
      });

      let prom = Promise.resolve();
      let promArr = [];
      photos.forEach(photo => {
        prom = prom.then(function() {
          return scrapeFn.getUserApproval(photo, res, req);
        });
        promArr.push(prom);
      });
      Promise.all(promArr).then(() => {
        console.log(
          '%s all images have been processed.',
          chalk.green('Success: ')
        );
      });
    }
  });
});
The photos array we have populated is looped through in the forEach(), and each instance resolves it’s own Promise. This is helpful because the scrapeFn.getUserApproval() will also return a Promise which is resolved when the user gives the command to approve or deny the image we have received. This means we are able to wait for the user input while we loop through the array of image URLs.
Approving the scraped content
As mentioned earlier, I was aiming to have an approval process which happens in the terminal, and once approved, the targeted image would save to my local disk and have that file referenced in a database, meaning I could then use the images in my app.
While researching and developing, I split this approval process into 2 parts; showing the scraped image to the user and taking the users approval (yes or no) based on the image.
Part 1 - showing the image to the user
The first part of the content approval process was to display the image to the user. I went down a number of routes to try and acheive what I wanted, and I’ll list a few here:
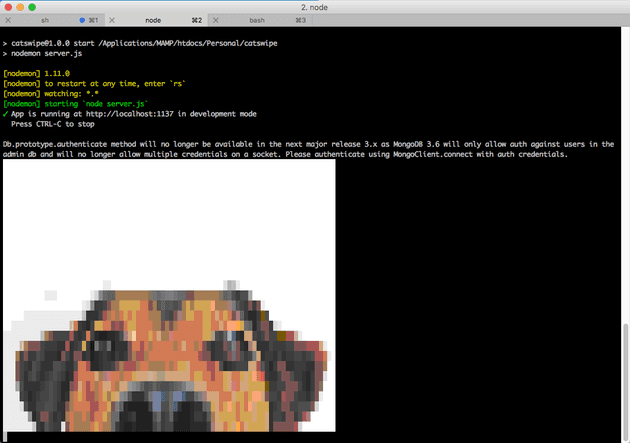
I already know that I want the user input to be done in the terminal, so I tried to get the image to display in the terminal also. I attempted this using an NPM package called picture-tube.
This was easy to set up, and did show my scraped image in the terminal, but the quality wasn’t great (kind of obvious looking back, but was worth a try):
I then looked an an alternative which was to open the image in the devices native image preview software, thanks to a relatively new NPM package called opn. This enables commands to the terminal to open URLs, images etc in the machines native software.
Again, this was easy to use and had a simple API:
opn("image-url.png").then(() => {
  // image viewer closed
})
But every time I tried to open a new image, it would open a new instance of the image preview software. This was bad becuase if I had 50 images to scrape for example, there would be 50 instances of Image Preview open on my laptop.
I then thought about using a web browser. Ok, so I wanted to avoid making a web based scraping system at the start, but this was only to show the image, which I could deal with. The user’s approval would still come from the terminal.
As the photos array is looped through, I attempted to send the images back to the browser for the user to view, one at a time, and eventually have the user approval taken from the terminal, which would skip to the next image. I tried this initially by using response.send() but this threw an error when getting to the second image as the response.send() automatically calls response.end(), causing the connection to end.
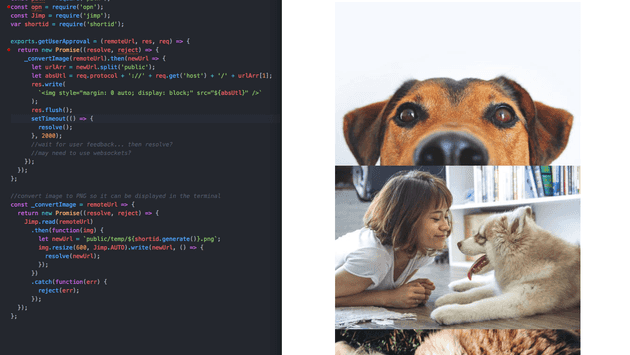
I thought I’d struck gold afterwards when I attempted to use response.write():
res.write(`<img src="${url}" />`)
//the flush was needed for cachine reasons as it woudn't show the second image without it
res.flush()
This did show the images in the browser, but they showed one after another:
Finally! After having a harder think I decided to look into Web Sockets (Socket.io specifically). It seems obvious now as sending information to a browser from the server on demand is quite literally what Socket.io was made for. It turns out the Web Socket route was easy to implement:
//scraper/index.js
const Jimp = require('jimp');
const shortid = require('shortid');

//req is passed from the scraper.js file as it contains the socket.io instance
exports.getUserApproval = (remoteUrl, res, req) => {
  return new Promise((resolve, reject) => {
    _convertImage(remoteUrl).then(newUrl => {
      let urlArr = newUrl.split('public');
      let absUtl = process.env.API_URL + '/' + urlArr[1];

      //send image to browser
      let io = req.app.get('socketio');
      io.emit('img', { imageUrl: absUtl, imageName: urlArr[1] });

      ... //the resolve function from user input will go here, which will move
          //on to the next image on demand (when the user's input as been taken)

    });
  });
};

const _convertImage = remoteUrl => {
  return new Promise((resolve, reject) => {
    Jimp.read(remoteUrl)
      .then(function(img) {
        let newUrl = `public/temp/${shortid.generate()}.png`;
        img.resize(600, Jimp.AUTO).write(newUrl, () => {
          resolve(newUrl);
        });
      })
      .catch(function(err) {
        reject(err);
      });
  });
};
This getUserApproval() function is exported into the main scraper.js file. As mentioned earlier, this function returns a Promise so we can control when to move to the next element in the main photos array via a resolve().
As you can see above, I also decided to use a package called Jimp to process the images before they’re shown to the user. This allows the image to be sized to a specified value for performance reasons when it’s eventually used in my app, as well as being converted to a PNG format from any format when it’s scraped.
The exciting part of this though is the io.emit() above. This is the Socket.io in action, and can be used like so with a minimal amount of code. This will return the currently scraped image URL back to the browser so it can be displayed to the user ready for approval.
The Socket.io process is a little out of scope for this post, so without going into too much detail on the entire process, I’ll show what’s on the front end, in a plain HTML file which is served to the user when they hit the /scrape URL:
<script src="/socket.io/socket.io.js"></script>
<script>
const socket = io();
socket.on('img', url => {
  let image = document.getElementById('img');
  image.querySelector('img').src = url.imageUrl;
  image.querySelector('p').innerHTML = url.imageName;
});
</script>
Part 2 - taking user approval in the terminal
Now we’re able to send images back to the user using Socket.io, we can continue to add in the user input. For this I used a package called inquirer which is pretty popular for this sort of thing, allowing the terminal to take in user input in the form of yes/no response (as I chose to use), as well as checkbox, free text and other responses.
Here’s the full code for the user input:
//scraper/index.js
const fs = require("fs")
const chalk = require("chalk")
const request = require("request")
const Jimp = require("jimp")
const shortid = require("shortid")
const inquirer = require("inquirer")
const Card = require("../../util/Cards")

exports.getUserApproval = (remoteUrl, res, req) => {
  return new Promise((resolve, reject) => {
    _convertImage(remoteUrl).then((newUrl) => {
      let urlArr = newUrl.split("public")
      let absUtl = process.env.API_URL + "/" + urlArr[1]

      //send image to browser
      let io = req.app.get("socketio")
      io.emit("img", { imageUrl: absUtl, imageName: urlArr[1] })

      //begin user input into terminal
      var question = [
        {
          type: "confirm",
          name: "keepImage",
          message: "Keep image?",
          default: false,
        },
      ]
      inquirer.prompt(question).then(function (answers) {
        if (answers.keepImage) {
          return _saveImage(absUtl, () => {
            resolve("saved")
          })
        }
        //resolve and move to next question
        resolve("skipped")
      })
    })
  })
}

const _convertImage = (remoteUrl) => {
  return new Promise((resolve, reject) => {
    Jimp.read(remoteUrl)
      .then(function (img) {
        //files are initially saved to a temporary diretory so they can be
        //discarded afterwards
        let newUrl = `public/temp/${shortid.generate()}.png`
        img.resize(600, Jimp.AUTO).write(newUrl, () => {
          resolve(newUrl)
        })
      })
      .catch(function (err) {
        reject(err)
      })
  })
}
In the main getUserApproval() function it shows the inquirer package taking an array of questions (just one question in this case) and saves the image if the result of the user input is true using the _saveImage() function.
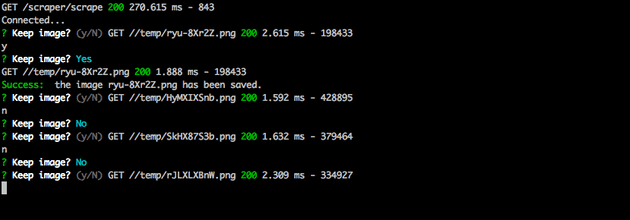
The output in the terminal is styled up a little using Chalk, and looks decent, although it can be improved:
Saving the scraped content
Getting the user input was relatively easy using Inquirer. The final steps is to save whatever content is retrieved from the scraper. I chose to save to a directory in my public assets folder on my app, but these can be saved anywhere. I also chose to log the directory and filename of each save in a MongoDB database so the database can be queried to return the images:
const _saveImage = (url, cb) => {
  return new Promise((resolve, reject) => {
    let urlSplit = url.split("/")
    let imgUrl = `public/catImages/${urlSplit[urlSplit.length - 1]}`
    let publicImgUrl = imgUrl.split("public")[1]
    let imgName = urlSplit[urlSplit.length - 1]
    request.get({ url: url, encoding: "binary" }, (err, response, body) => {
      if (err) throw err
      fs.writeFile(imgUrl, body, "binary", (err) => {
        if (err) throw err
        let card = new Card()
        card.url = process.env.API_URL + "/" + publicImgUrl
        card.imageid = imgName
        card.save((err) => {
          if (err) return console.log(err)
          console.log(
            "%s the image %s has been saved.",
            chalk.green("Success: "),
            imgName
          )
          cb()
        })
      })
    })
  })
}
Cleaning up
I chose to make a temporary directory which holds the images as the user is approving them. This is helpful because the images which the user approves can be kept by copying them to a normal app directory, and after all images have finished processing, the /temp directory can be emptied.
As we’re using Promises to control the user approval process, it was easy enough to use the Promise.all() function to execute the cleanup task when all images had finished:
let prom = Promise.resolve()
let promArr = []
photos.forEach((photo) => {
  prom = prom.then(function () {
    return scrape.getUserApproval(photo, res, req)
  })
  promArr.push(prom)
})

Promise.all(promArr).then(() => {
  //delete all images in temp
  scrape
    .emptyTemp()
    .then(() => {
      console.log(
        "%s all images have been processed.",
        chalk.green("Success: ")
      )
    })
    .catch((e) => {
      console.log(
        "%s the target directory or file may not exist. Please check the parameters of the function or delete the temporary files manually.",
        chalk.red("Failed: ")
      )
    })
})
Creating an NPM package
After developing and using the scraper in a project of mine, I decided I wanted to publish the code, write a blog post right here, and publish to the NPM registry so I could use again and hopefully help someone else out in the process if they needed something similar.
This required a bit of fiddling around, and mainly because I didn’t want to have to use the whole Express.js framework for such a small project. I decided to replace Express with a few lower level modules (Connect and Serve-Static).
Moving over to a published NPM package also meant a switch around of some of the functions and how I’d originally structured everything. Here are the main updates I made:
- Encapsulating everything relevant in a
module.exports- this meant I am able to call the package from another project. - Add user specified parameters - there’s no use limiting everyone to the boring test websites I was using so I added a few parameters for users to add in the web URL, class selector of the image to scrape, and directory to save, as well as a callback function to run when each image is saved.
- Add project under Git control (obviously) and then publish to NPM with the
npm publishcommand.
Das Ende
Thanks for reading! You can find the final code on my Github if you want to take a look, or if you want to use the NPM package in your own project you can find it here.
If you have any suggestions about it please send them through as I know it’s by no means perfect! I have a to do list which is on the README of the package, so I’ll eventually be updating a few bits when I get time.
Senior Engineer at Haven


